Between 1999 and 2013 I lived in a flat in Ghent, Belgium, near the city center, after I left a rural village where I had a dome with a Takahashi Epsilon astrograph and an Astro-Phyiscs refractor on a heavy German made Alt 7 mount. Observing or photography from the city had to be done on a small balcony with a view south. I used several mounts made by Astro-Physics, Losmandy and Takahashi, including an EM200, the AP900GTO, Mach 1 and AP1200 GTO with a variety of telescopes from Astro-Physics, TMB, Celestron and Intes. Deepsky photography was next to impossible to do reasonably, just because of severe light pollution in Ghent. I had to travel to France for dark skies, using a portable setup with different SBIG and Starlight Xpress CCD camera’s.
When we recently acquired a house outside the city again, in the community of Lochristi, I really wanted to erect an observatory again. I did remember how comfortable such a shelter could be, having all equipment readily at hand, without having to do polar alignment, cabling and calibration each and every time – let alone taking down all the equipment after a long night.
A modified garden shed was installed, and I spend quite some time thinking about the equipment to install. Having read lots of interesting things on the Italian made 10micron mounts, I decided I really wanted to give this mount a try for a number of reasons.
First of all, it does not require a PC in the observatory. I am working as a computer consultant and it’s nice for once not needing to use a computer. I like to take photographs, but I also enjoy visual observations and computer screens distract. So, no desire for a computer system at all, as long as the mount provided the intelligence.
Second, the 10 micron mount promised extreme precision, and with some initial calibration effort, could be used for unguided photography. A real bonus when you have little time and can skip guide scopes, zillions of miles of cabling and guiding camera calibration hassles. I prefer to keep things as simple as possible: use a quality telescope, a well known (modified) DSLR and make guiding unnecessary by using a modern, encoders equipped mount. The fact the 10 Micron would be able to track comets, asteroids and even satellites, all without computer system connected was the icing on the cake.
I have been using several telescopes on the 10 Micron 2000 HPS II mount: initially a Celestron C14 Edge HD with a topmounted Takahashi FSQ106ED. Since October 2014 a Takahashi TOA 150 is installed, together with a Takahashi TSA 102 refractor. I enjoy testing different optics and regularly replace telescopes, but the combination of the TOA 150 and TSA 102 is a dream setup for me: both have absolutely stunning optics and can be used for some planetary imaging, but just as well for lunar and solar observing and they are up to the highest possible standards for deep-sky photography work. Frankly, in 40 years of astronomy, I have never seen better optics and a more complete system overall (be it Takahashi does specialize in demanding exotic adapters and not so cheap little rings by numbers).
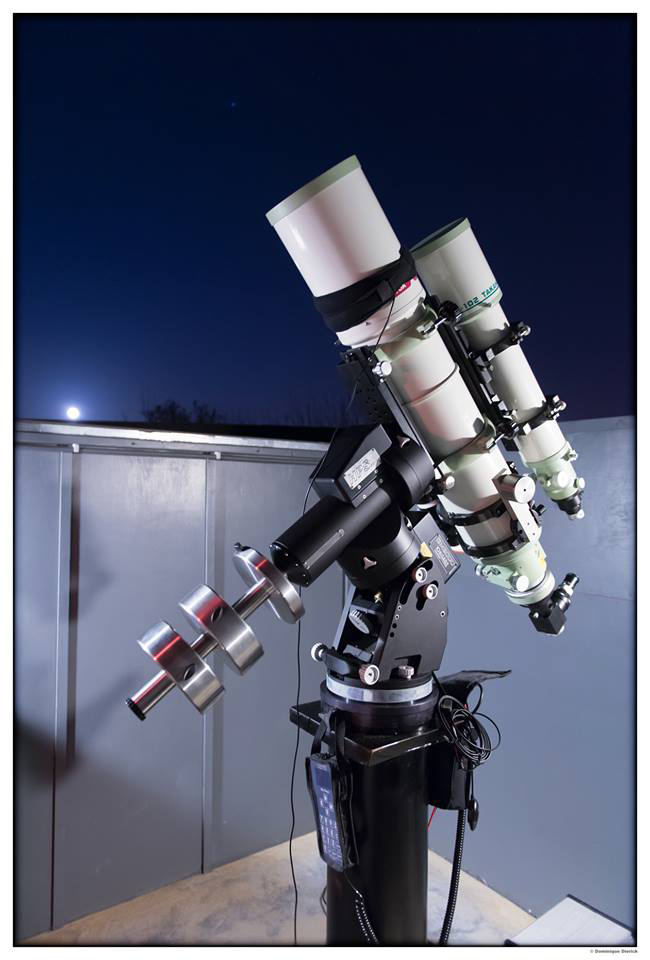
Setup in the observatory: 10 Micron 2000 HPS II with TOA 150, TSA 102 and Lunt 60mm solar scope
My first experience in deep-sky photography with the 10 Micron mount was well… just great. A good friend of mine was visiting the observatory and asked whether we could observe some deep-sky objects. Of course, even with a C14, this can be very disappointing under light polluted skies in Belgium, especially for someone not used to observe faint fuzzies. I told him, with a camera, he could see more. So, I hooked up my modified Canon 6D to the C14 Edge. In 30 seconds we had a nice image of M82, in color. “Can you make a longer exposure?” he asked. Well, maybe, but it will likely show trailing, because of mount imperfections and less than perfect polar alignment, I replied. “Why don’t you just give it a try?” he laughed.
So I did, I programmed 10 minutes of exposure at the prime focus (nearly 4 meter). Much to my surprise, the image turned out to be perfect. No trailing at all! Tight stars! And in technicolor! I was stunned. A precise mount is one thing, a mount tracking for 10 minutes at that focal length was outstanding and something I had never seen before.
The mount keeps track of just about anything: dual axis, object proper motion, refraction corrections and orthogonality errors. Brilliant stuff those Italians have done. The controller logic even takes into account local temperature and air pressure values to calculate refraction (and, by the way, these are important for unguided photography). I do wish they had provided a built-in metering system into the controller or in the GPS – for now, one has to enter the values by hand.
Since that night, I have used the 10 Micron 2000 HPS on many occasions, performing unguided deep-sky photography. The alignment stack records of Nebulosity 3.1 often show a delta of just 1 or 2 pixels (Canon 6Da) drift over a 3 hour interval. Peanuts. The mount allows me to elaborate further on the “InstaSky” concept I developed last year. Like the well known Instagram photography system, the “InstaSky” is focused on making astronomical images very fast: with no guiding, no darks, no flats, a short exposure and quickly share the image on social media. A sample of such an InstaSky can be seen on my APOD image of August with Comet Jacques between the Heart and Soul Nebula.
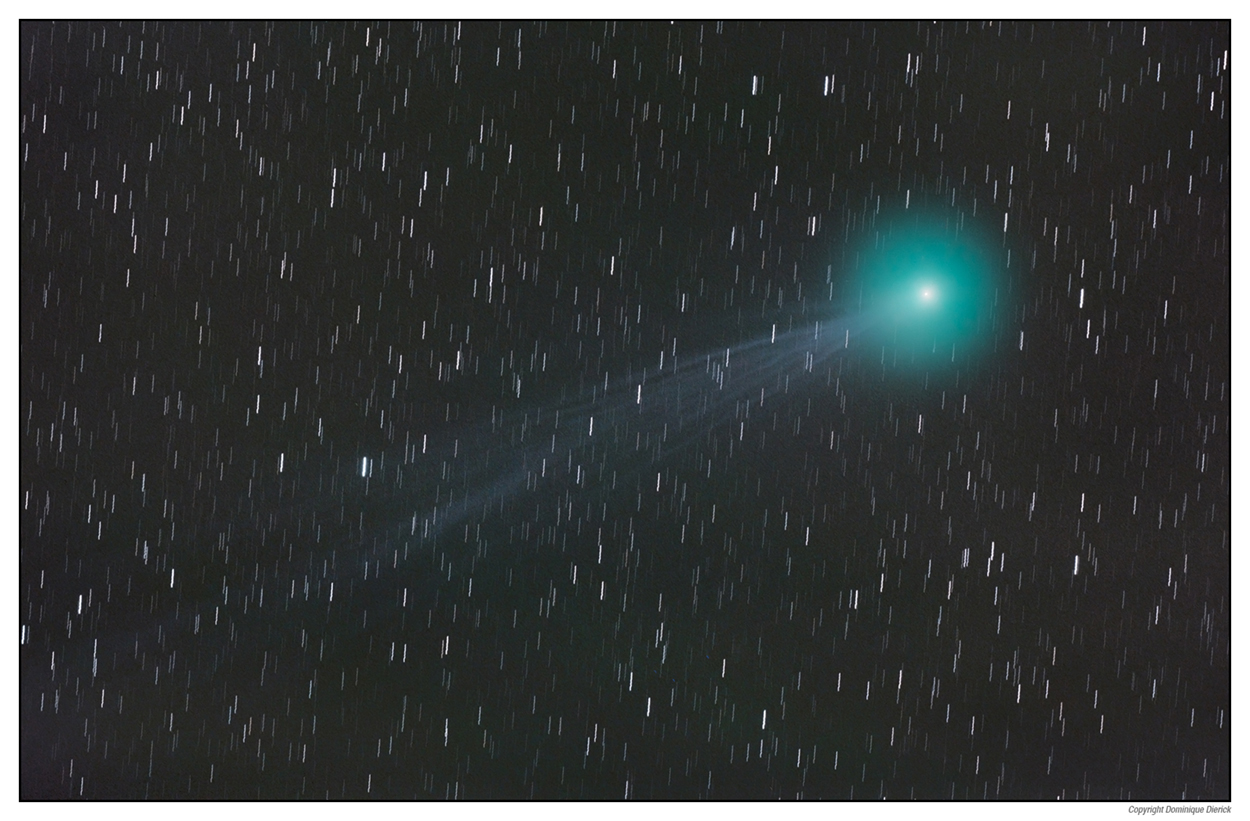
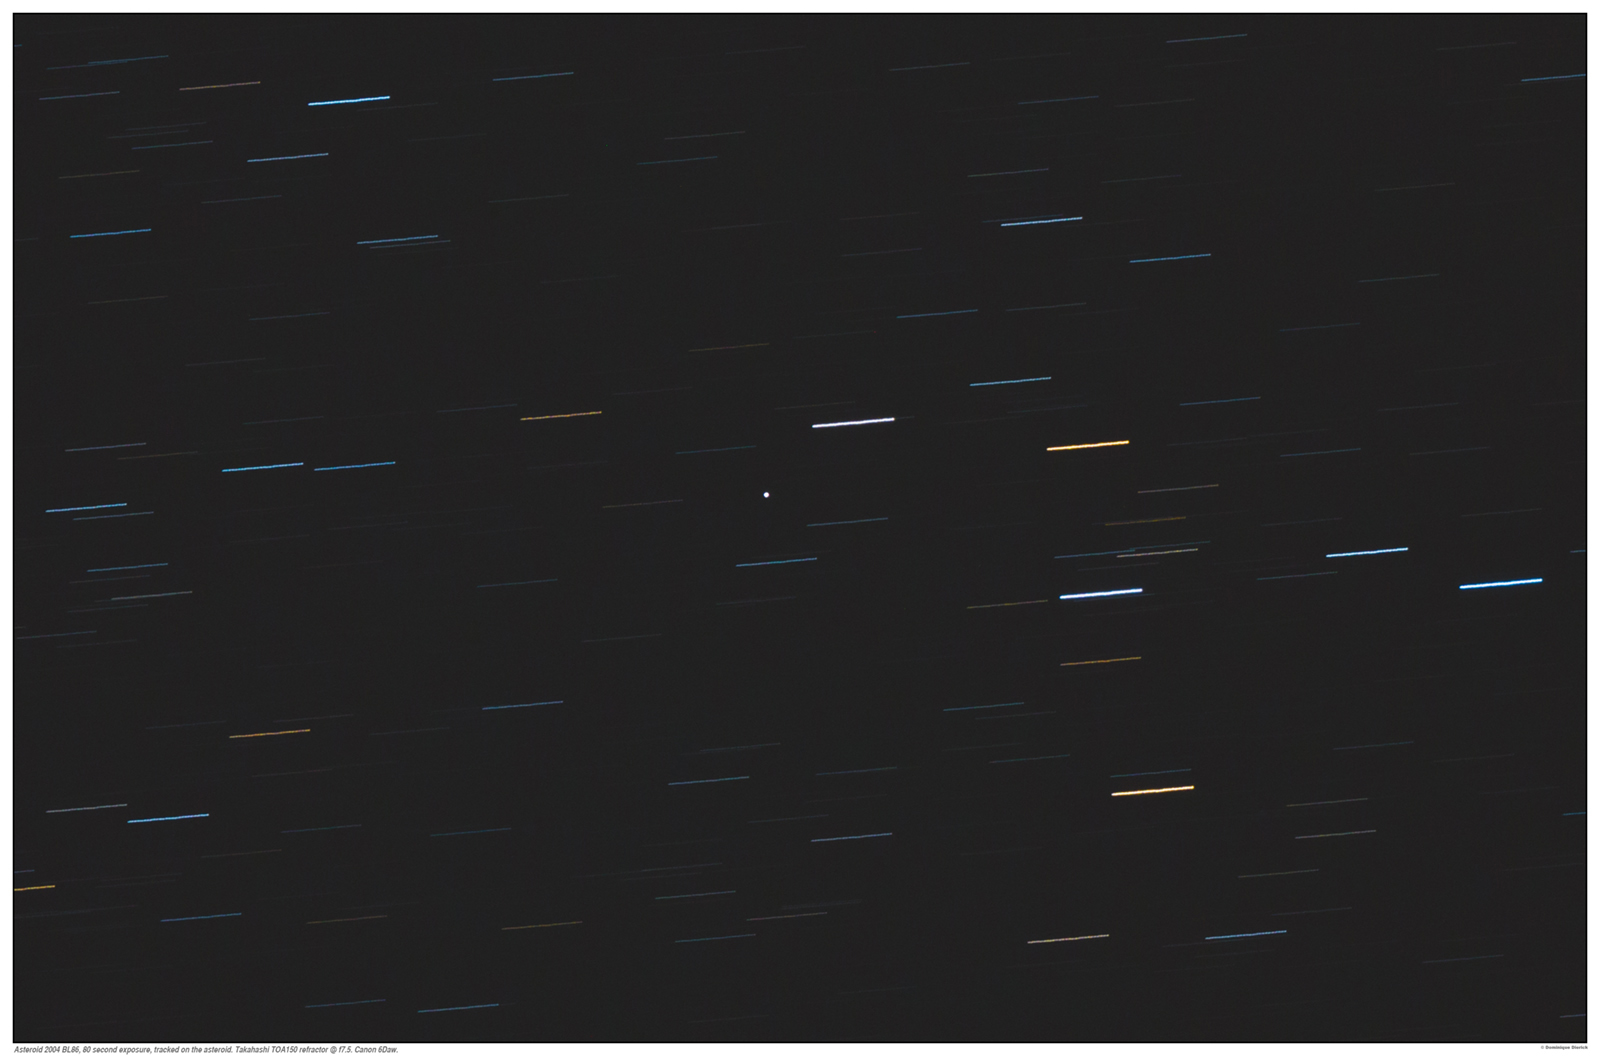
Photographing asteroids (like the close passage of 2004 BL86 this year) or comets (Lovejoy) proved to be child play. Download some recent orbital elements tables, upload them via the provided ethernet link to the controller and you’re all set for the night. See the attached images from both objects, where the mount tracked the asteroid and the comet without any further intervention, via the mount dual axis tracking with lock on object.
So, all this precision work must require lots of preparation to make sure the mount is very well aligned, with quite a few nights of tuning the system, one must think. Well, actually, no. That was the most pleasant surprise. Initial setup only took two hours (with the optional GPS attached). First I completed a 3 star alignment after rough sighting of Polaris through the telescope. Adding more calibration stars gradually increases pointing accuracy. With 20 or so calibration stars registered, I let the mount guide me through polar alignment (the mount already gives an indication how far you are from the true pole).
It’s a frequently used algorithm: the mount slews itself to a star (or at least where it should be with perfect polar alignment) and lets you center the star with the use of the altitude an azimuth mechanical fine controls to offset the wrong rough polar alignment.
I repeated this process twice and got a pointing accuracy of less than 10 arc seconds over the entire sky, and a very good polar alignment. Doing a slew to Jupiter or Venus lands the planet on the webcam, no sweat.
ISS, snapshots with TOA 150 and Extender TOA 1.5 with Nikon D610

Recently with Space Station ISS visible nearly overhead, I got one of the finest experiences in my decades long astronomy hobby: visually observing ISS. Like many other amateurs, I had imaged ISS with manual tracking before (as good as is humanly possible). However, the 10 Micron promised full auto, and it delivered on that promise.
Last week, I downloaded a recent copy of the satellites database and uploaded it in the 10 Micron controller, ready to make images of the Space Station. The controller predicts the passage of ISS (or any satellite) on the hand paddle. After confirming you want to observe the next passage, the mount slews the telescope to the position where ISS will appear and sits idle. As soon as ISS becomes visible the mount generates a loud beep and starts tracking. First slowly, then faster as ISS moves up in the sky. When the mount hits the (custom programmed) limit, it beeps a few times and makes a pier flip, to pick up ISS on the other side of the meridian. Wow, this IS amazing stuff.
It resulted in nice images, taken with my Nikon and the TOA 150 with field flattener in its extender.
However, the most pleasing experience was to be able to observe ISS visually and share that experience with visitors. It is magic to see ISS appear in the telescope, at first very small and tiny, with the golden solar panels, and grow bigger and bigger, without having to worry about tracking the object manually. Even visitors can now have a relaxed look for themselves. Just peek in the eyepiece… and watch ISS race across the sky, passing background stars at high speed.
Of course, other mounts can be more or less retrofitted with ASCOM software driven solutions from a PC to offer similar functionality, but then, you have to live with potential cable spaghetti and a computer system next to the mount. The 10 Micron does it out of the box.
As with any complex software based system, some minor quirks are unavoidable. I have stumbled on a few (actually, surprisingly few) bugs in the logic, that hopefully will get corrected in a future firmware update. But none of those have caused any serious trouble, limiting the mounts functionality or imaging.
What does prove critical is a correct balance of the scope(s). The clutch system can be locked via three locks on each axis, but not very rigidly. Too much unbalance and the clutches will definitely not hold it. Which may not be a bad design idea, since too much unbalance is not desirable for a system moving at a dazzling 15 degrees per second speed when slewing or doing a pier flip. Especially for longer systems, like larger refractors or long Newtons, I would recommend implementing a system with a moveable counterweight along the tube to prober balance the scope after swapping accessories like heavy camera’s and the like.
This being said, I would recommend this type of mount to any serious astrophotographer or visual observer. It doesn’t get any better than this.
Asteroid 2004 BL86 – automatic tracking, image with TOA 150 refractor in prime focus with Canon 6Da
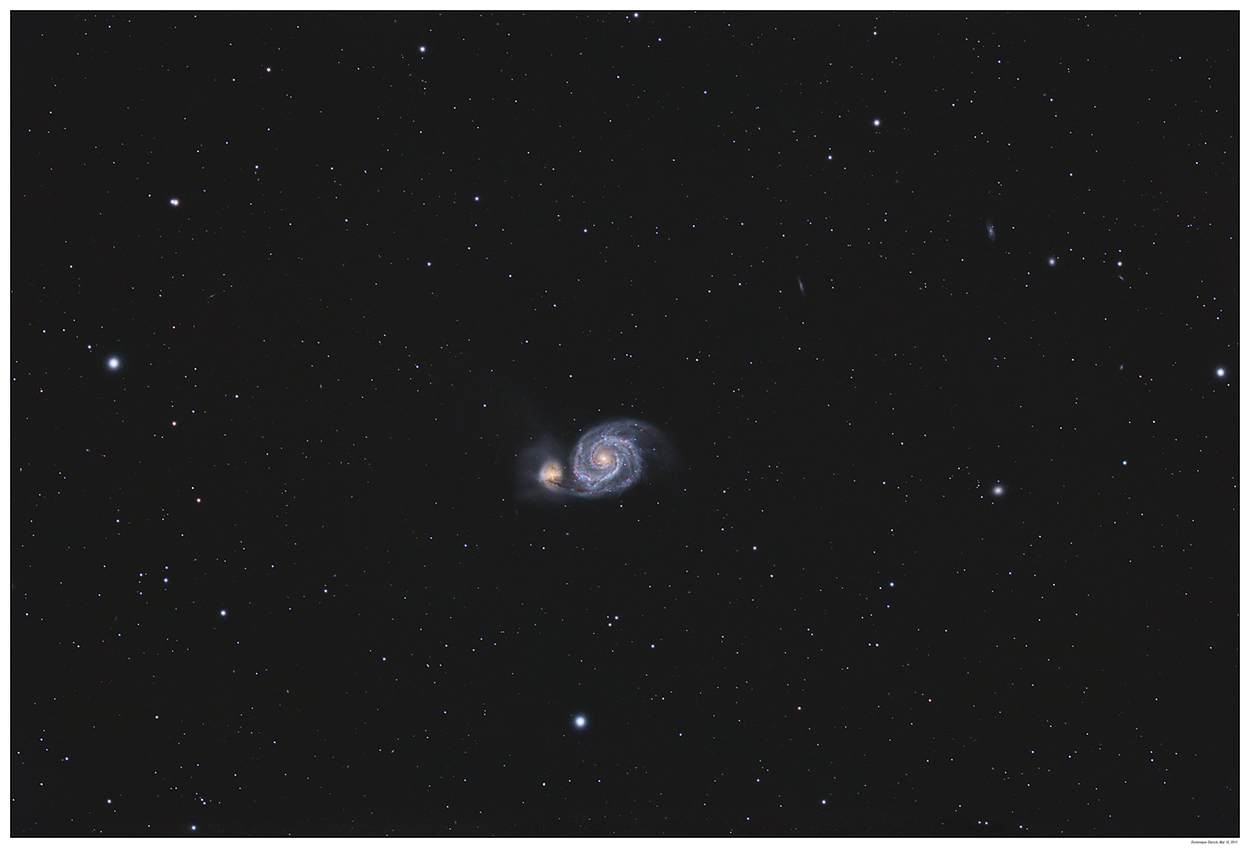
M51, two hours unguided exposure in total with TOA 150 in prime focus with Canon 6Da
ISS, snapshots with TOA 150 and Extender TOA 1.5 with Nikon D610
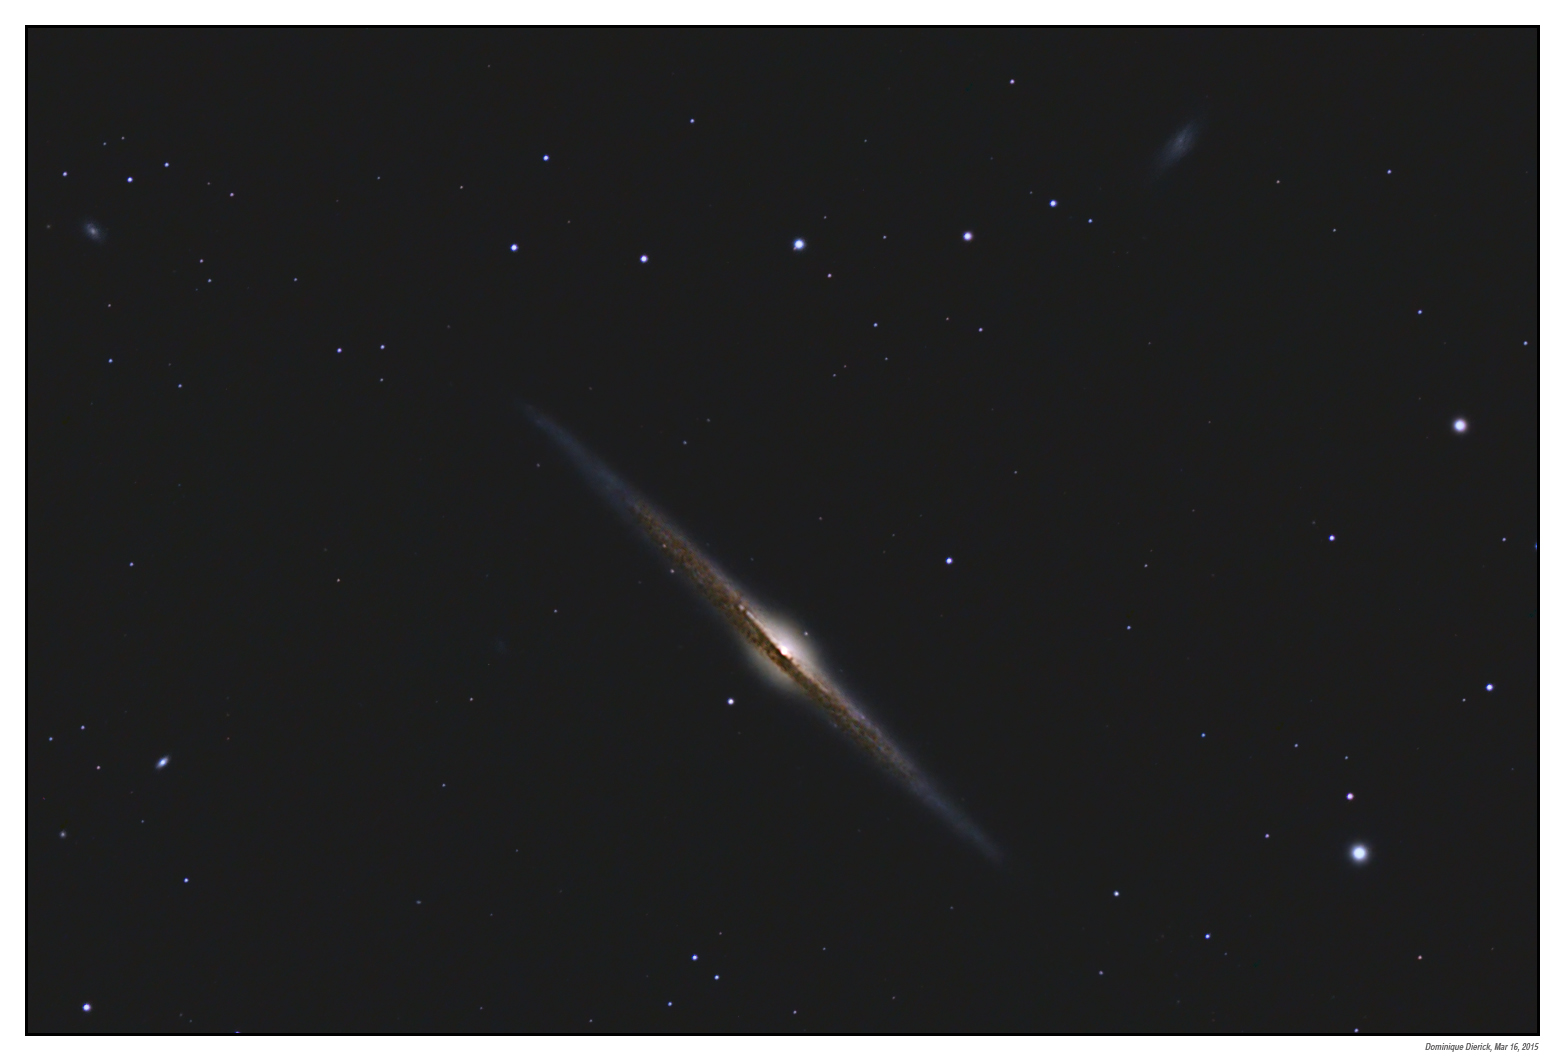
NGC4565, three hours unguided exposure in total with TOA 150 in prime focus with Canon 6Da