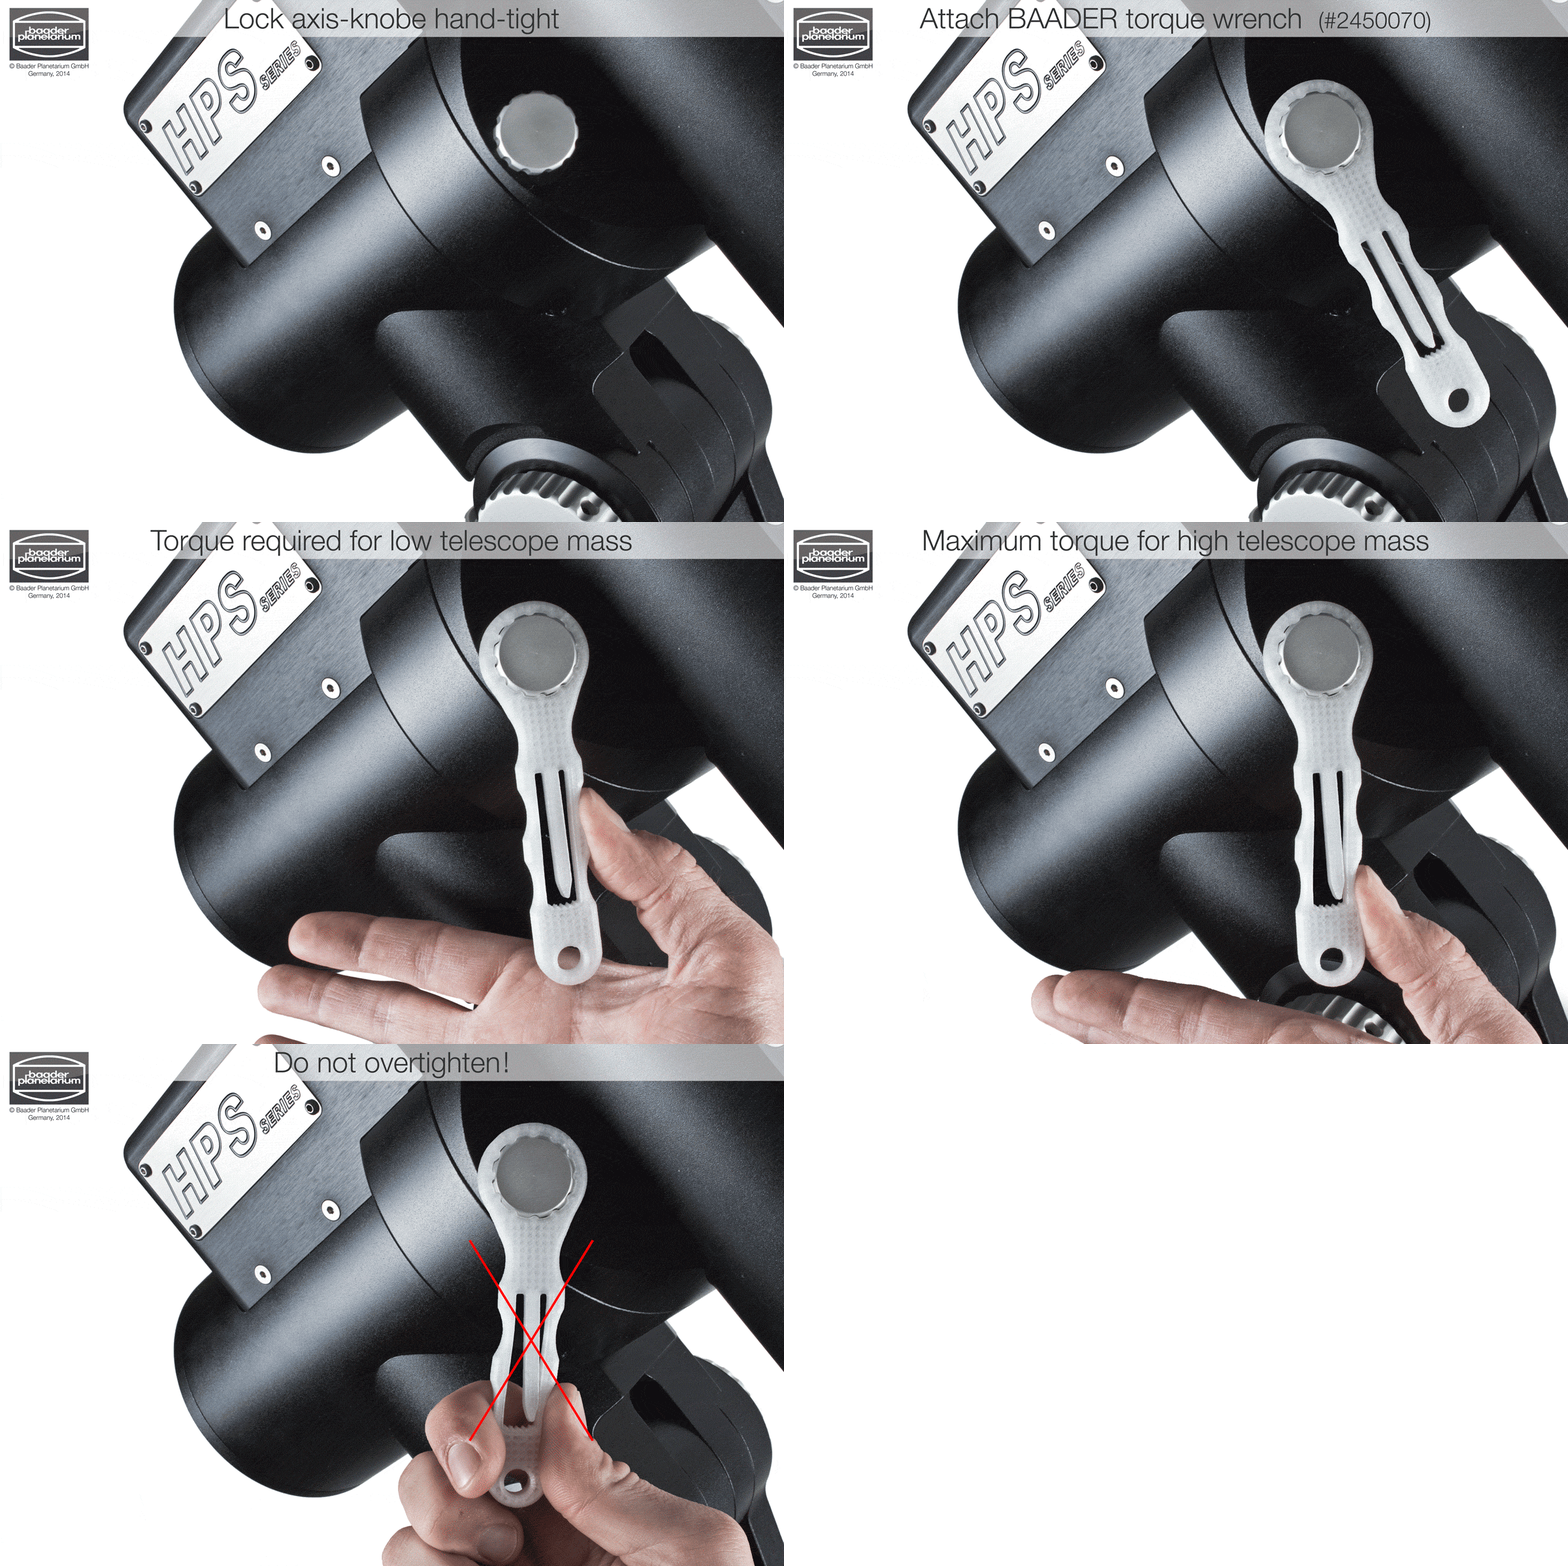
The axis knobes of the GM1000 mount were constructed in a way so they can’t be hand-tightened with brute force. This design feature leads some users to the fact that the RA or DEC axis of the mount can not be tightened sufficiently. If you had problems to open or tighten the RA / DEC axis knobs (on cold nights with gloves this is difficult), we now have the solution for you: We have developed two versions of a RA/DEC-wrench, with which the knob can be operated easily. Both keys are produced on own 3D printers.
At this point we would like to present both versions:
RA / DEC standard wrench for 10Micron/GM 1000
A simple wrench with the exact shape of the knobs for the RA / DEC axis. We offer you the STL file for this wrench free of charge as download. However, you will need a 3D printer. The standard version of the RA / DEC wrench is not available for purchase from us in finished, printed form.
NOTE: the axis knobes must never be over tightened!
Download STL-File:
#2450070 | RA/DEC-torque wrench für 10Micron/GM 1000
In this improved version the key has not a fixed basic shape, but has a built-in torque indicator. The clamping of the RA / DEC axis is to be tightened – with great care -appropriate to the instrument weight. This version we do not offer as a free download, but as a finished, printed product.

this wrench is called RA / DEC torque wrench – because it is NOT a flat spanner for the bottom plate. You should never tighten “until the blood runs out” – for that the wrench is NOT suitable. This wrench is made to enable a tightening/opening of the axis knobes – with sensitivity – so that they can be operated more easily than with bare fingers, but not as tight as with a heavy spanner. Note the above animation and, in particular, the position of the thumb in the two recessed grips.
Screen 1: starting position – tighten the axis knob by hand
Screen 2: attach Baader RA / DEC torque wrench properly
Screen 3: light clutch preload – with finger in the front grip and pointer deflection on the first index tooth from the center
Screen 4: maximum preload – with the finger in the rear grip and with maximum pointer deflection (the pointer touches very lightly the inside of the wrench)
Screen 5: Please DO NOT overtighten!

